It is good to have fuel
It did not leak when I bought the car… it really did not. This leak came when just brushing the dirt out. I managed to stop it with soap.

Soap is good, but it doesn’t last as a permanent solution.
So there was an extra, unplanned task in my Kanban-table.
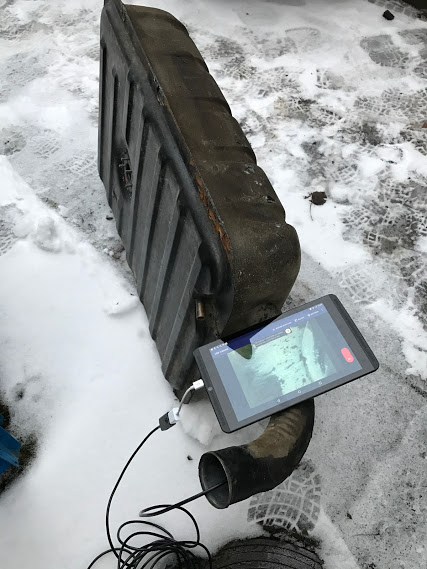
There it was, removed and studied.

An endoscope really is a good buy. Mine is connected to an Android.

inside the tank, there are two party walls shaped like this. So there are three divisions.

Rust in upper parts. Especially the joints.

Down there some parts look even beautiful.

Some rust, nothing major.
Ok, now it was time to make a decision. Tempting reproductions are available (between about 400-600 € delivered to Finland). After a while I thought this original one was forth saving. Perhaps I would purchase a new one in silence afterwards…
I also gave a thought to EU. There is going to be more and more bio ethanol in fuel. (Hooray EU and its ideological movements with no actual benefits) So all those rusty spots will blossom out. I ordered a can of this slime called POR15 to seal the tank from inside.

Hint. 0,5 liter is enough for P1800’s 45 liter tank.
So the plan was: Cleaning outside – mending – cleaning inside – sealing inside – painting outside.
Cleaning outside
Few hours, hot air, chemicals, knife, sand paper, few more hours. Already at this point I wondered if this was a good idea after all.


Two open holes and dozens of holes-to-be. And many dents. Dents may be as they are, they have history.

Craters all over (Holes-to-be they may be)
Mending
Tin is the only way I can think of. I already had the goods.
Because playing with fire, the tank must be absolutely fuel-free. Water is the best displacer for any steams. And a hair-dryer comes next. I did both.

The good old “hair dryer integrated to fuel tank with Scotch” -trick
Then the mending. This was my beginners arsenal.

Left: Bar of body tin. Pasta, which works as a primer to the tin. Wooden spatula saturated with motor-oil. (olive oil is not okay, because it catches fire). (They say Apple tree is good wood here, but I used an Ikea butter knife) Pasta is brushed to the tank . Burner or hot air blower. Burner is better!. And a rag (cotton) to clean the slag from the pasta after its tin has melted. Rubber cloves, pasta has some acids I believe.

There you can see two most visible holes in eleven a clock

When heating the pasta you can see its color change when the tin melts. Then it is time to swap it clear. Melted tin covers all the small craters and is a perfect primer for the body tin. I put this where ever there were craters, just in case.

Holes were mended one by one. The biggest one is the next one. Body tin can be melted few times if you don’t like the result. With a bottom of a fuel tank I was not that puritanical.

No more visible holes
Cleaning inside
Acid needed. E330 as 4% was my solution.
You need more than one bathroom with this hobby.

Citric acid. In 45 litre tank you need 1,8 kg. Make sure it stays warm for about 48 hours. Hair dryer needed again!
Sealing inside
Took no pictures from the sealing event, because both hands needed and sealer is sticky. Half a liter of POR15 would have been enough instead of one liter. Money and chemicals wasted.
Endoscope gives hope.

Upper parts show no rusty spots any more.
Painting outside
One may have noticed I like zink. So I started with zink and continued with Hammerites Metal Paint. Few layers.


So easy to paint

Finished and waiting for the trunk to be as finished
Epilog
This tank episode took quite a long time and was not so neat thing to do. Compared to purchasing a new, clean tank I saved around 300 €. I think it was worth it. or do I ..not sure if I do… At least I learned something… I guess..
What I really learned was that if it starts to leak again, I so know what to do.
